My First Journey to Making Sourdough Bread (Or as I like to call it – weirdough)

I didn’t think I would ever make sourdough as bread making is quite a dark art to me let alone sourdough! However, from my last trip to Poland I mentioned to Anna and her colleagues (from the company we were visiting) about my baking and this blog. She asked if I make bread often to which I obviously replied with a ‘no, not really but have made bread before’. To my delight, and I loved her optimism, she kindly offered me some of her sourdough ‘starter’ to help me make my own sourdough bread. Up till then I had no idea what it involved. There was mention of maintaining this starter dough by feeding it for days and letting it grow – (sounded to me like I was about to adopt a pet! and I was also concerned about border control questioning me with this odd substance in a jar that I’m trying to take back home).
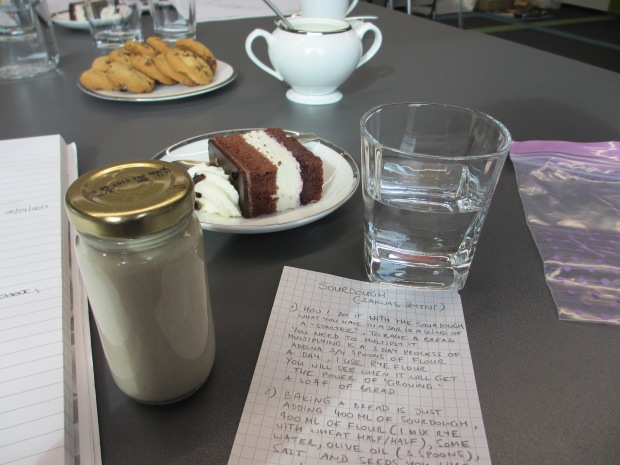 So of course the sourdough starter made it home safe and I was able to start nurturing this goo.
Anna wrote me a simple recipe that she uses but because it’s my first attempt I wanted to use one that is more detailed – step by step for a dummy like me.
I looked at various recipes online but in the end I went for the one that came first in my Google search.
As always I read through the recipe several times, planned out what other ingredients I needed or how much time required for the different stages. Now, this bread took me days to make…daaaaaays. But don’t let that scare you away from trying this recipe as most of that time was taken up in the proving of the dough.
I don’t want to direct copy the recipe I used in this blog but rather give you an insight into how I made this bread and my experiences. By the way I’m rather chuffed with the result so I’m pleased to be writing this blog!
Sourdough Starter
Ingredients
- wholemeal bread flour
- water
If you’re lucky enough to be passed down some sourdough starter from someone else then great! Otherwise here’s a link to how to start your own, the recipe I used is also from this website too (it’s a good one so have a read)! Sourdough starter recipe. It’s easy to make the starter but it’s a long process.
I kept the starter in the fridge until I was ready to start the process. Anna mentioned I needed to have the starter at room temperature so I took it out of the fridge the day before. When ready I took the 100ml jar that Anna gave me, tipped it in a mixing bowl and began the journey of the great sourdough.
I added to the mixing bowl 4 tablespoons of wholemeal flour and equal amounts of water and gave the whole thing a good mix – trying to incorporate air into it. Once incorporated I covered the bowl with cling film. I did this every night for the next 5 nights. Every morning I took a peek and was delighted to see bubbles forming in the starter kit.

Sourdough Leaven
Ingredients
- 2 tablespoons sourdough starter
- 50ml water
- 50g strong white bread flour
When the starter is ready we need to prepare what sourdough bakers call the sourdough leaven. The recipe I needed to make the actual bread required 100g of leaven – here’s how to make it –
take 2 tablespoons of your sourdough starter, put it in a bowl and add to it 50ml of water and 50g of strong white bread flour. Mix well and leave covered in a warm room overnight until it is alive and bubbly. Simple right?!
The Main dough with some folding and folding


The following night on the Friday after work and after a few post drinks I went on to prepare the ‘main’ dough.
- 300ml water
- 100g leaven
- 100g wholemeal flour
- 400g strong white bread flour
- 10g fine sea salt mixed with 15g cold water
- semolina to dust baking pan/stone (to be used towards the end when ready for baking)
Put the leaven in a mixing bowl add the water and flours and mix well until a large dough ball is formed – I used my hands for this part of course. Cover the bowl up in cling film for between 30 minutes to 2 hours – I left mine for about 1 hour.
Next use your finger and press into your dough to form some dimples. Then add the salt water mixture and sprinkle all over the top of the dough. Leave for 10 minutes.
Here comes the folding part. This is not quite the typical kneading process, it’s a folding process. To do this lift up a side of the dough and fold it towards the centre. Turn the bowl 90° and repeat the lift and fold towards centre. Do this 3 times.
Done. No only kidding! You’ll need to do this 3 more times at 30 minutes interval – happy folding!!
Better Shape Up and Let it Rise


Now I treated myself to a new Banneton basket for shaping the bread. It’s not necessary but I wanted that swirl look on this loaf for a bit of fanciness and fun. You can get these quite easily online or in a specialist baking shop. I got mine from here.
Prepare the Banneton basket by coating the inside quite generously with flour. Shape the dough into a ball and place it in the basket. Dust the top of the dough with some flour then cover with a damp clean cloth.
Let the dough prove until it has doubled in size – my dough took about 12 hours to achieve this (sometimes you’ve got to have patience). The recipe I looked at actually said prove until 50% bigger but I let mine rise for a bit longer.
Once risen move the dough to the fridge and let it sit there for 8 – 12 hours. When mine was ready for the fridge it was already late afternoon so I decided I would leave it in the fridge overnight and bake it in the morning – perfect timing! The dough can be left in the fridge for longer than the 12 hours I think.

Bake!
Yaaaay we made it!
Preheat the oven to 220° fan for at least 30 minutes before baking. Again I splashed out with a new baking stone to help provide an even heated surface for the bread to bake on. If you don’t have one use a heavy based pan instead.
Place the baking stone or the pan in the oven while it’s preheating.
When ready carefully take the stone/pan out of the oven and sprinkle some of the semolina to stop the dough from sticking. Carefully place your nicely shaped dough onto the surface and give it a few slashes to give that tear look on the top of the bread.
You’ll need to place a big pan/tray of boiling water in the oven as well under where you’ll bake the dough so make sure you have prepared space for this. This will produce steam while the bread is baking and apparently it gives a beautiful crust to the bread.
Ok! Ready – Bake!
The recipe I looked at said bake for 1 hour but mine was ready after 30 minutes. I checked the bread and it made that hollow sound so I didn’t want to leave it in the oven any longer. I think the longer you leave it the harder the crust will get – and darker too, which you might want. Remember you’re in control so do what you want.
So I think that’s it. Wait for the bread to cool down slightly before cutting into it. Exciting stuff! Good luck if you decide to make this. The long process might seem daunting at first (it was for me!) but once you get going it’s not so bad. And as long as you read and prepare yourself for the recipe you will be fine!
There’s not actually many ingredients to work with in this basic recipe – it just requires a lot of patience and time.
I will definitely make this again and maybe try with Anna’s recipe next time with seeds and honey.
Have a go and I would love to hear your own sourdough journey.


